

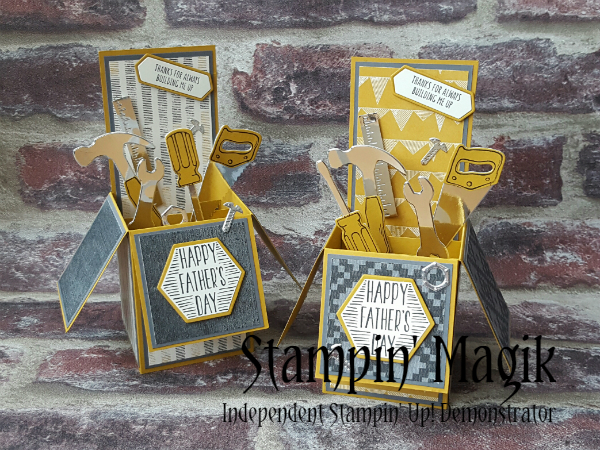
Nailed It Pop-up Box card!
Today I am excited to share with you one of my favourite type of
cards to make…Pop-up Box cards.
These cards are that something special to gift a loved one and
they can keep it displayed on their shelf or desk…I bet they won’t want to take
it down!
For this particular card we will be making a Father’s Day card
and I will of course be using the Nailed It Clear-Mount Bundle (144735) and Urban
Underground Designer Series Paper (142783).
You will need;
Delightful Dijon - A4 sheet ( 8.3 X 11.7")
Basic Grey:
6 1/2 x 8 1/2
cm x3 (2 9/16 x 3 3/8")
6 1/2 x 6 1/2
cm x3 (2 9/16 x 2 9/16")
6 1/2 x 17 1/2 cm x2 (2 9/16 x 6 3/4")
Urban Underground DSP:
6 x 8 cm x3 (2 3/8 x 3 1/8")
6 x 6 cm x3
6 x 17 cm x1 (2 3/8 x 6 11/16")
Very Vanilla - 6 x 17 cm
Ink: Black Ink
Mirror or Silver cardstock
Pop-Up box card video ~ Part 1
Some of part 1 is a little off camera, I am still working on a
good set-up for filming and the camera was a little low down to get the whole
A4 sheet in while I was working on it, but hopefully you can still get an idea
of how to make it. Here is an image to hopefully help explain what to score and
cut a little better:
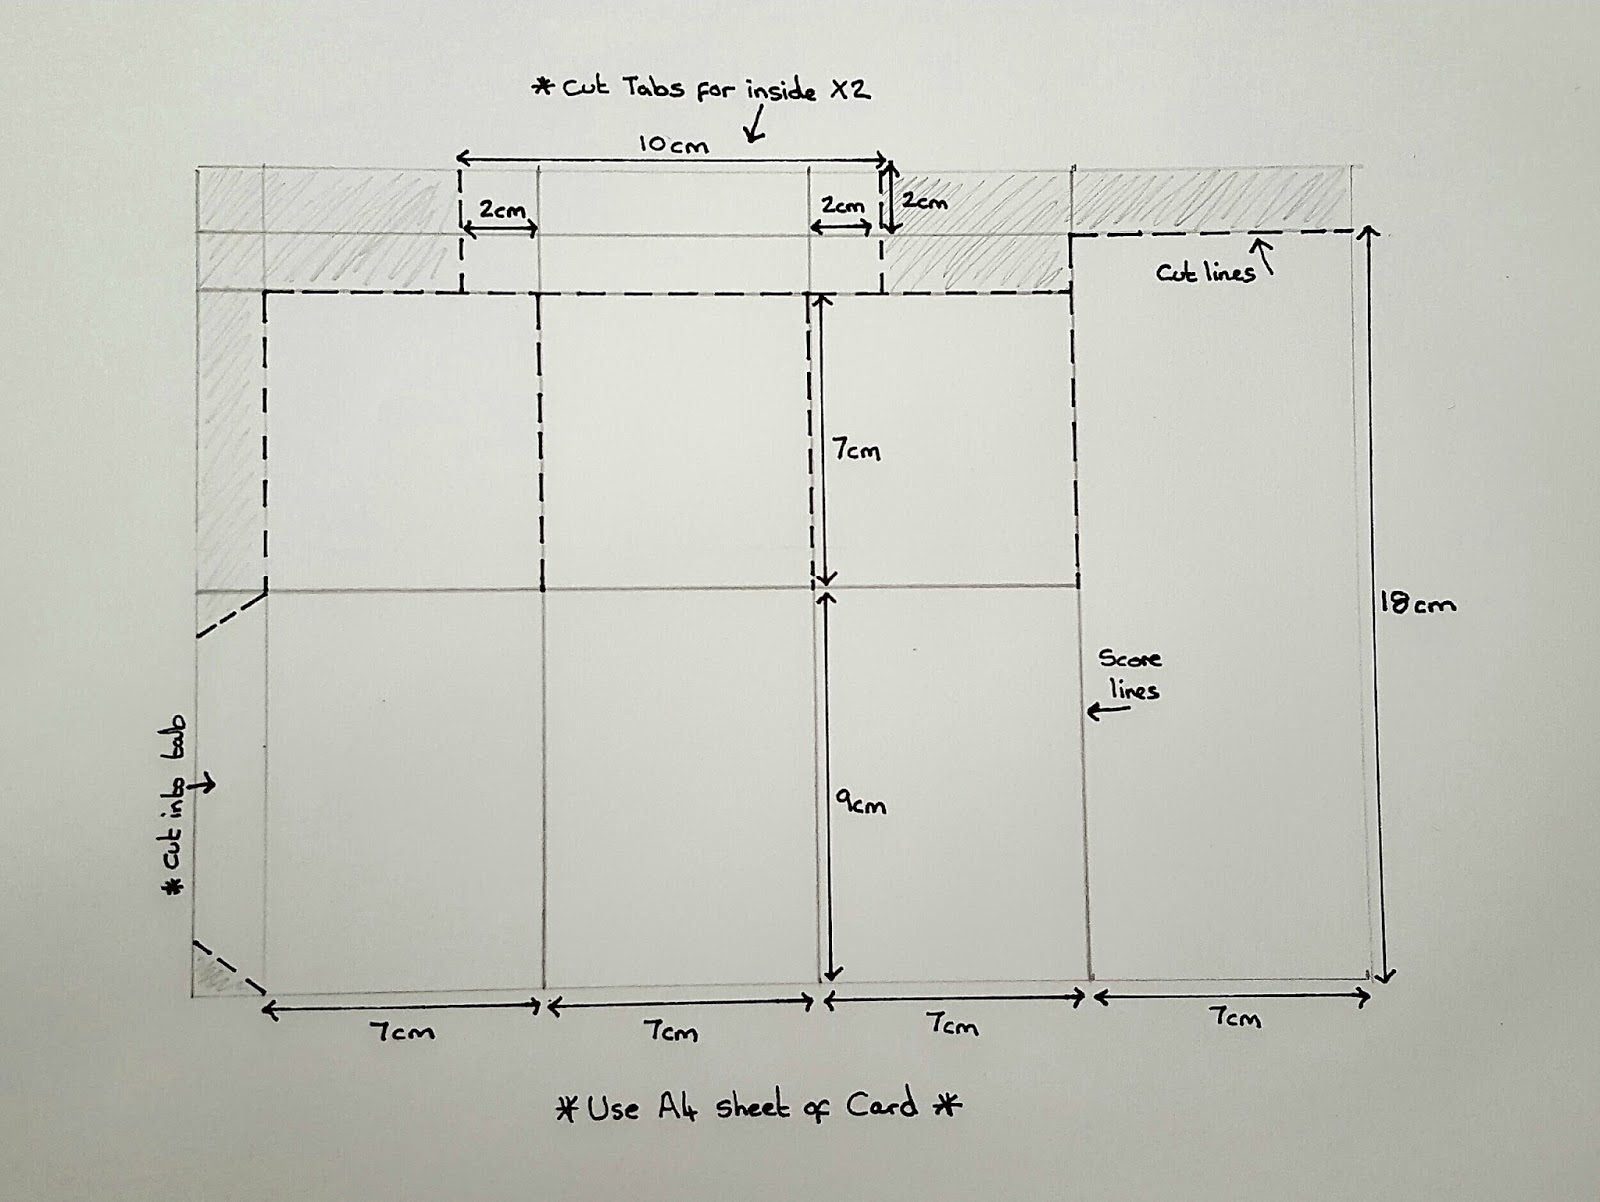
Basics on how to make the Pop-Up Box base:
* To start with you
want to turn your A4 Delightful Dijon cardstock horizontal and score down at
every 7cm (2 3/4"), which will give you 4 panels and a small tab slice.
* Then turn vertical
with the tab part closest to you, score the nearest 3 panels and tab at 9cm (3 2/4").
* Then score the
full length at 18cm (7").
* Cut along the top as
show above, and down to the 9cm (3 2/4") score line to create the ‘flap panels’ and at
an angle creating the tab on the side.
* Fold and burnish
all the score lines.
* Add adhesive to the tab, fold and stick to the inside of the box.
* With the longer
left over piece, cut 2cm (6/8") either side of the score lines creating a 10 X 2cm
strip with 2 score lines. Cut 2 at 2cm (6/8) thick. This becomes your inside tabs.
* Add adhesive to both ends of the tabs and stick to the inside of the box as in the video.
Once you have your box made you are ready to decorate!
If creating this box in different sizes...take off 1/4" or 1/2cm off the box measurements for the card panels and again for the DSP to leave a small boarder :)
If creating this box in different sizes...take off 1/4" or 1/2cm off the box measurements for the card panels and again for the DSP to leave a small boarder :)
Pop-Up box card video ~ Part 1
They are
perfect for any theme for any occasion; try a balloon explosion, bouquet of
flowers or toy box theme.
Hope you enjoyed this project and have fun creating :)
Happy Stamping,
AMIE


